
Dino Stacking Toy Free Crochet Pattern - Part III
- Elisa
- Feb 18
- 4 min read
Updated: Mar 27

Happy Tuesday my crafty friends!
We’ve made it to the final part of our free dinosaur stacking toy pattern!
Today, we’ll be learning how to make the Legs an the Pole, bringing our dino to life and completing the project.
Once these final pieces are done, it’s time for the little ones to start stacking, playing, and having tons of fun with their new handmade toy!
I hope you’ve enjoyed this crochet-along, and I can’t wait to see your finished dinos. Don’t forget to share your creations!
Let’s get crocheting!
If you’re looking for an even more detailed experience, I’ve got you covered!
A super detailed pattern with over 60 step-by-step images,
is available in my Etsy store.

***You can purchase a downloadable AD-FREE PDF of the patterns with 12 pages, more than
60 step-by-step pictures,
and tips to guide you through the making process

Here is the FREE Crochet Pattern!
YARN
Premier Yarn® Anti Pilling - Everyday Bulky (Art. #1068)
#20 Lapis 2 balls (A)
#06 Gold 1 ball (B)
#24 Rust 1 ball (C)
MATERIALS
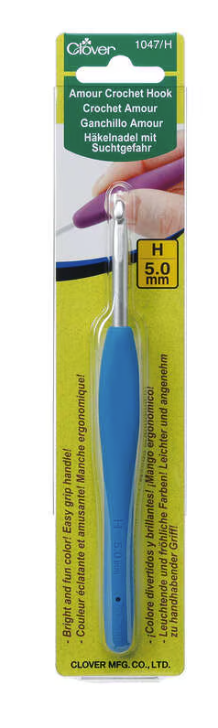
Crochet hook size H (5 mm)
White embroidery thread
Sew on Safety Eyes (9 mm)
Embroidery Needle
Poly Filling
DIMENSIONS
About 8 in. x 8 in. (20 x 20 cm)
ABBREVIATIONS
ch = chain
rep = repeat
rnd(s) = round(s)
sc = single crochet
hdc = half double crochet
sl st = slip stitch
st(s) = stitch(es)
hdc = half double crochet
SKILL LEVEL
Easy
GAUGE
12 sc + 12 rnds = about 4 in. (10 cm).


Disclosure. Most blog posts on this website contain affiliate links. This means I get a small commission if you click-through & purchase (no additional cost to you).


Work in Close Rounds: join at the end of each round with a sl st, then ch 1.
Back Legs (make two)
With E, make a magic ring.
Rnd 1: Work 6 sc in the magic ring – 6 sc.
Rnd 2: 2 sc in each st around – 12 sc.
Rnd 3: sc in next st, 2 sc in next st; rep from around – 18 sc.
Rnd 4: Sc in each st around – 18 sc.
Rnd 5: sc in next st, sc2tog; rep from around – 12 sc.
Rnd 6: sc in next 4 sts, sc2tog; rep from twice – 10 sc.
Fasten off, leaving a long strand of yarn for sewing the Back Legs to Ring III. Stuff the Legs while sewing. Embroider Nails with white thread.
Front Legs (make two)
With E, make a magic ring.
Rnd 1: Work 6 sc in the magic ring – 6 sc.
Rnd 2: sc in next st, 2 sc in next st; rep from around – 9 sc.
Rnd 3: sc in next st, sc2tog; rep from around – 6 sc.
Rnd 4: Sc in next 4 sts, sc2tog – 5 sc.
Fasten off, leaving a long strand of yarn for sewing the Front Legs to Ring II. Stuff the Legs while sewing. Embroider Nails with white thread.
Pole
With B, make a magic ring.
Rnd 1: Work 6 sc in magic ring – 6 sc.
Rnd 2: Sc in each st around – 6 sc.
Rnd 3: sc in next 2 sts, 2 sc in next st; rep from twice – 8 sc.
Rnds 4 - 5: Sc in each st around – 8 sc.
Rnd 6: sc in next 3 sts, 2 sc in next st; rep from twice – 10 sc.
Rnds 7 - 9: Sc in each st around – 10 sc.
Rnd 10: sc in next 4 sts, 2 sc in next st; rep from twice – 12 sc.
Rnds 11 - 13: Sc in each st around – 12 sc.
Rnd 14: sc in next 5 sts, 2 sc in next st; rep from twice – 14 sc.
Rnds 15 - 16: Sc in each st around – 14 sc.
Rnd 17: working in BLO, sc2tog around (7)
Fasten off, leaving a long tail. Stuff the Pole. Thread tail through top of sts of last rnd. Pull tail to close opening and knot securely.
Rnd 20: join B yarn to any one st front loop Rnd 16 of the pole, 2 sc in each st around (28)
Rnd 21: sc in next 6 sts, 2 sc in next st; rep from around – 32 sc.
Rnd 22: sc in next 7 sts, 2 sc in next st; rep from around – 36 sc.
Rnd 23: sc in next 8 sts, 2 sc in next st; rep from around – 40 sc; turn.
Rnd 24: Sl st in each st around – 6 sl st.
Fasten off, cut the yarn and weave in ends.

I can't wait to see your version of my DINO STACKING TOY. Feel free to tag me (@elisascrochet) in your photos on Instagram or Facebook!
Elisa
This pattern is an original pattern by Elisa Sartori of Elisa's Crochet. Please do not claim this pattern as your own. If you wish to share this pattern, you may link to this pattern but please do not reprint it on your site. You may keep a copy for your own personal use but please DO NOT sell the pattern or distribute it.
You may sell products made from this pattern but please clearly credit the design to me, Elisa Sartori of Elisa's Crochet. Permission is NOT granted for mass production or factory manufacturing of any kind. Thank you!
Nesabamedia adalah situs teknologi yang memberikan berita, tutorial, ulasan software, dan tips komputer secara lengkap, mudah, dan informatif.
Best research paper.
Nursing assignment help.
Pay someone to take my online class.
Kebutuhan sekolah, kuliah, atau kerja bisa terpenuhi hanya dari IDM Kuyhaa.