Festive Hanging Ornament Free Crochet Pattern
- Elisa
- Dec 18, 2024
- 3 min read
Happy Tuesday my fellow crafters!
Simple, cute, and festive! This crocheted ornament is a must-make for anyone looking to craft something special this holiday season. It’s fast to whip up and perfect for spreading cheer. Whether you’re decorating your tree or gifting something heartfelt, this quick project is sure to delight.
The intricate texture created by puff and bobble stitches makes it extra special.
So, what are you waiting for? Grab your yarn and hook, and start creating this lovely project today!
***You can purchase a downloadable AD-FREE PDF of the patterns with 8 pages, more than
40 step-by-step pictures,
and tips to guide you through the making process
Here is the FREE Crochet Pattern!
YARN
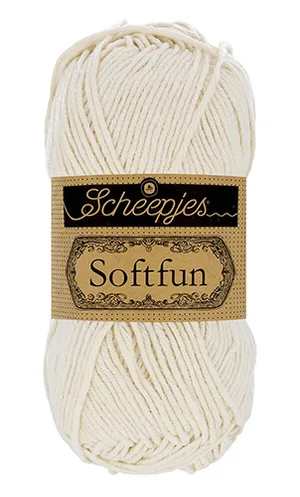
Scheepjes® Softfun® (Art. #1592)
#2606 Moss 1 ball (A)
#2622 Latte 1 ball (B)
#2655 Cerise (C)
MATERIALS
Crochet hook size E (3.5 mm)
Embroidery Needle
Poly Filling
DIMENSIONS
About 3 in. (7.5 cm)
ABBREVIATIONS
ch = chain
rep = repeat
rnd(s) = round(s)
sc = single crochet
sl st = slip stitch
hdc = half double crochet
dc = double crochet
ps = puff stitch
bo = bobble stitch
st(s) = stitch(es)
SKILL LEVEL
Easy
Disclosure. Most blog posts on this website contain affiliate links. This means I get a small commission if you click-through & purchase (no additional cost to you).
Front and Back Panels
With A make a magic ring.
Rnd 1: Work 16 dc in ring – 16 dc.
Work the last st of Rnd 1 with A until two loops of the last stitch remain on the hook. Use B to complete the stitch.
Rnd 2: With B, ch 1, 1 ps and 1 ch in each st around – 32 sts; TURN.
Rnd 3: With A, ch 2, 1 bo and 2 chs in each ch-space – 48 sts; TURN.
Close the Rnd with a sl st, then switch to B and ch 1.
Complete the last st of Rnd 2 with B, then close the Rnd with a sl st with A.
Rnd 4: With B, ch 1, sc in each st around – 48 sts.
Fasten off and cut the yarn.
Join the 2 panels:
Place the wrong sides together and with A, working in the back loops only, sl st through both layers – 48 sl st.
Stuff it before closing it.
Do not fasten off.
Hanging Loop
Keep working with B, ch 20 very tightly, then sl st into the 1st sl st of Rnd 4.
Fasten off, cut the yarn and weave in ends.
I can't wait to see your version of my FESTIVE HANGING ORNAMENT! Feel free to tag me (@elisascrochet) in your photos on Instagram or Facebook!
Elisa
This pattern is an original pattern by Elisa Sartori of Elisa's Crochet. Please do not claim this pattern as your own. If you wish to share this pattern, you may link to this pattern but please do not reprint it on your site. You may keep a copy for your own personal use but please DO NOT sell the pattern or distribute it.
You may sell products made from this pattern but please clearly credit the design to me, Elisa Sartori of Elisa's Crochet. Permission is NOT granted for mass production or factory manufacturing of any kind. Thank you!


Book this night to savor a sexy, unlimited erotic fun with hot beautiful sexy girls that blend professionalism and seductive magic. Treat yourself to the ultimate in Delhi Areas Call Girls, where grown-up pleasure is art. At Delhi Areas Escorts, you have sexy girls who are the pinnacle of luxury, seduction, and professionalism. Our independent hookups girls, such as attractive Russian escorts girls and charismatic college escorts girls, guarantee to bring unlimited pleasure at any moment you want.
Escort Service in Ashram
Vikaspuri Escort
Escort in Civil Lines
Dhaula Kuan Escort Service
Escort Service Bijwasan
Nursing assignment help.
Best research paper.
Pay someone to take my online class.
Academic writing assignment help.