
Jeff the Duck Free Crochet Pattern
- Elisa
- Mar 4
- 5 min read

Happy Tuesday!
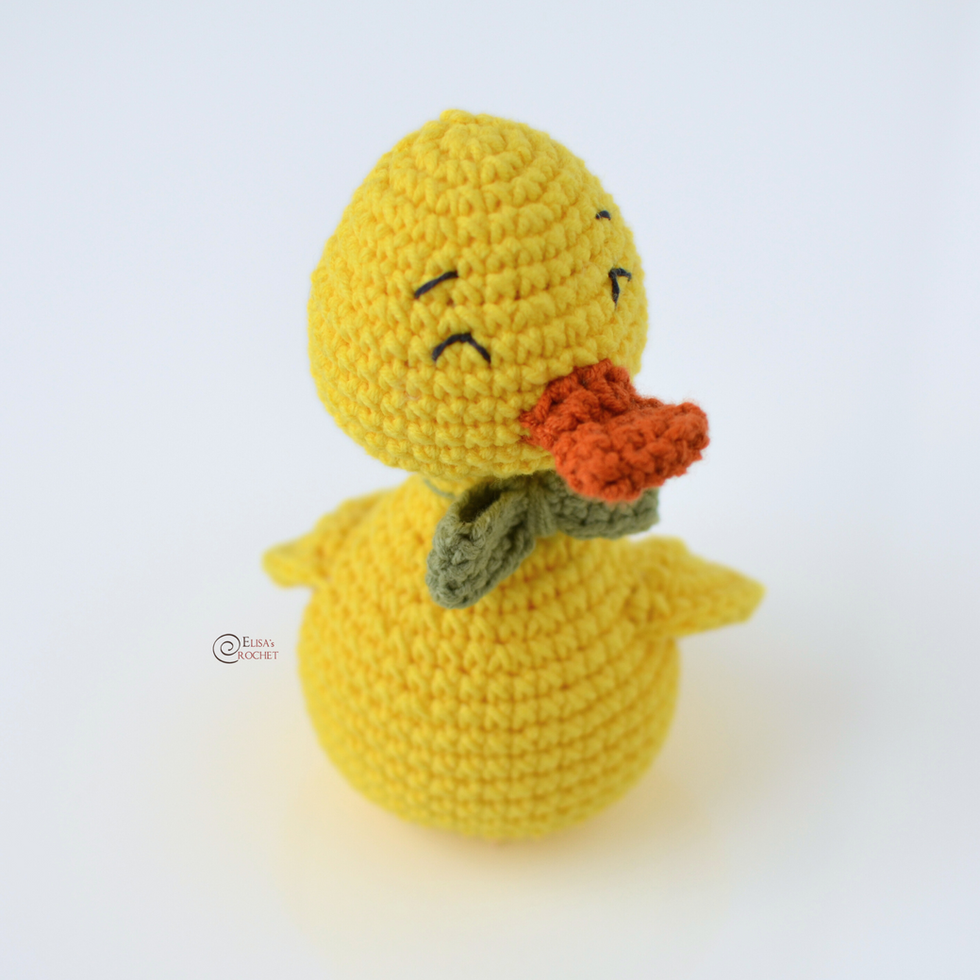
This little duck has waddled its way into my heart, and now it’s ready to do the same for you! With its round belly, tiny wings, and the cutest little beak, it’s the perfect project for spring or any time you need a dose of handmade sweetness.
Whether you're making it for yourself, a little one, or as a thoughtful gift, this duck is sure to bring a smile.
Perfect for beginners and seasoned crocheters alike, this project works up quickly and is great for using up leftover yarn.
Want to add an extra touch of charm? If you’d like to give your duck a dapper little bowtie, the instructions for that are available exclusively in my paid pattern version, which includes step-by-step illustrations and extra details to make your project even more special.
Happy crocheting!

***You can purchase a downloadable AD-FREE PDF of the patterns with 7 pages, more than
30 step-by-step pictures,
and tips to guide you through the making process

Here is the FREE Crochet Pattern!
YARN
Scheepjes SOFTFUN 10x50 g
#2618 Canary 1 ball (A)
#2431 Clay 1 ball (B)
#2606 Moss 1 ball (C)
MATERIALS
Crochet Hooks: 3.5 mm
Yarn Needle
Poly Stuffing
DIMENSIONS
About 5 in. x 4 in. (13 x 10 cm).
ABBREVIATIONS
ch = chain
rep = repeat
rnd(s) = round(s)
sc = single crochet
hdc = half double crochet
dc = double crochet
sl st = slip stitch
st(s) = stitch(es)
SKILL LEVEL
Easy
GAUGE
20 sc + 20 rnds = about 4 in. (10 cm).


Disclosure. Most blog posts on this website contain affiliate links. This means I get a small commission if you click-through & purchase (no additional cost to you).
Body
With A, make a magic ring.
Rnd 1: Work 6 sc in the ring –6 sc.
Rnd 2: 2 sc in each around – 12 sc.
Rnd 3: sc in next st, 2 sc in next st; rep from around – 18 sc.
Rnd 4: sc in next 2 sts, 2 sc in next st; rep from around – 24 sc.
Rnd 5 - 6: Sc in each st around – 24 sc.
Rnd 7: sc in next st, 2 sc in next st; rep from around – 36 sc.
Rnd 8 - 13: Sc in each st around – 36 sc.
Rnd 14: sc in next st, sc2tog; rep from around – 24 sc.
Rnd 15: Sc2tog around – 12 sc.
Rnd 16: Working in front loop only, sc even – 12 sc.
Rnd 17 - 18: Sc in each st around – 12 sc.
Begin stuffing and continue until piece is complete.
Rnd 19: sc in next st, 2 sc in next st; rep from around – 18 sc.
Rnd 20: sc in next 2 sts, 2 sc in next st; rep from around – 24 sc.
Rnd 21: Sc in each around – 24 sc.
Rnd 22: sc in next 3 sts, 2 sc in next st; rep from around – 30 sc.
Rnd 23: sc in next 4 sts, 2 sc in next st; rep from around – 36 sc.
Rnd 24: Sc in each st around – 36 sc.
Rnd 25: sc in next 5 sts, 2 sc in next st; rep from around – 42 sc.
Work 5 chs – this is going to be your starting point of the next round.
Rnd 26: Sc in the 2nd ch from the hook, sc in next 3 chs; keep working on the rnd 25, sc in next 42 sts; keep working on the chs, sc in next 4 chs – 50 sc.
Rnd 27: Sc in next 4 sts, 2 sc in next st, sc in next 40 sts, 2 sc in next st, sc in next 4 sts – 52 sc.
Rnd 28 - 29: Sc in each st around – 52 sc.
Rnd 30: Sc2tog, sc in next 48 sts, sc2tog – 50 sc.
Rnd 31: Sc2tog, sc in next 46 sts, sc2tog – 48 sc.
Rnd 32: sc in next 4 sts, sc2tog; rep from around – 40 sc.
Rnd 33: sc in next 3 sts, sc2tog; rep from around – 32 sc.
Rnd 34: sc in next 2 sts, sc2tog; rep from around – 24 sc.
Rnd 35: sc in next st, sc2tog; rep from around – 16 sc.
Rnd 36: sc2tog around – 8 sc.
Fasten off, leaving a long tail. Thread tail through top of sts of last rnd. Pull tail to close opening and knot securely.
Beak
With B.
Rnd 1: Ch 5, 2 sc in 2nd ch from the hook, sc in next 2 chs, 4 sc in next ch; keep working on the opposite side of the foundation chain, sc in next 2 sts, 2 sc in the last st – 12 sc.
Rnd 2: sc in next 4 sts, sc2tog; rep from twice – 10 sc.
Rnd 3: sc in next 3 sts, sc2tog; rep from twice – 8 sc.
Rnd 4: sc in 1st st, (1 sc and 1 hdc) in next st, (1 hdc and 1 sc in next st), sc in next 5 sts – 10 sts.
F/O and leave a long strand of yarn. Do not stuff the Beak.
Sew the Beak to the Head between Rnds 9 and 12.
Wings
With A, make a magic ring.
Rnd 1: Work 8 sc in the ring – 8 sc.
Rnd 2: 2 sc in each st around – 16 sc.
Rnd 3: sc in next st, 2 sc in next st; rep from around – 24 sc.
Rnd 4: sc in next 2 sts, 2 sc in next st; rep from around – 32 sc.
Fold in half the piece and work through both layer of the last round, sc in each st across – 12 sc.
F/O and leave a long strand of yarn to sew Wings to the side of the Body, between Rnds 23 and 29. Sew only the upper part, leaving the lower free.
Embroider Eyes between Rnds 7 and 9, and Eyebrows between Rnds 5 and 7, (6 sts apart).


I can't wait to see your version of my JEFF THE DUCK. Feel free to tag me (@elisascrochet) in your photos on Instagram or Facebook!
Elisa
This pattern is an original pattern by Elisa Sartori of Elisa's Crochet. Please do not claim this pattern as your own. If you wish to share this pattern, you may link to this pattern but please do not reprint it on your site. You may keep a copy for your own personal use but please DO NOT sell the pattern or distribute it.
You may sell products made from this pattern but please clearly credit the design to me, Elisa Sartori of Elisa's Crochet. Permission is NOT granted for mass production or factory manufacturing of any kind. Thank you!
Scary good deals: paid horror games for free!
Brand: IWC SchaffhausenModel: Ingenieur Automatic 40 Reference Number: IW328901 / Ref. IW328902 / Ref. IW328903 / Ref IW328904 IW328901 / Ref. IW328902 / Ref. IW328903 / Ref IW328904Diameter: 40mmThickness: 10.8mmCase Material: Stainless link steelDial link Color: black/ silver-plated/aqua/greyLug-To-Lug: 45.7mmWater Resistance: 100mStrap/Bracelet: Integrated link stainless steel bracelet with folding clasp
This link oddball is about as specific a watch as you're ever going to see: A quartz-powered link Seiko chronograph in two-tone steel and gold(tone), with an alarm function. The 7T32 designation represents the link quartz movement inside the watch, a movement produced by Seiko from the late '80s to the early aughts.
very awesome your artikel bro canduan188
bandar toto togel
link slot demo
link toto 4d
merupakan platform terpercaya dengan menawarkan hadiah dan permainan dengan pengalaman yang berbeda dari yang lainnya